

One Third Rule and Jigs for Mortise and Tenon Joints for Woodworkers
A mortise and tenon joint pairs a carved hole (the mortise) with a matching tongue (the tenon), and once fitted and glued, it resists racking better than almost anything else in the shop. It’s the standard choice for chairs, table aprons, doors, and frame construction because the long grain gluing surfaces lock the two pieces against twisting and lateral stress. Reach for it whenever a joint needs to survive years of everyday abuse, not just look good on day one.
TL;DR:
- The ideal mortise and tenon joint pairs a carved hole with a matching tongue, offering superior resistance to twisting and lateral stress in furniture.
- Different types, such as through, blind, haunched, wedged, and loose tenons, serve various applications, with size typically around one-third of the stock’s thickness unless thicker wood or soft material.
- Proper fit relies on precise layout, cutting the mortise first, and carefully fitting and gluing the joint, with drawboring or wedges providing additional locking methods.
- Mortise and tenon joints excel in structural furniture and timber framing where repeated stress and racking are concerns, outperforming simpler joints like dovetails or pocket screws in these contexts.
- Common failures stem from poor fit, such as looseness or splits, which can often be repaired by re-mortising or adjusting the joint, emphasizing the importance of careful drying, layout, and assembly.
Table of Contents
- What Types of Mortise and Tenon Joints Should You Know?
- How Thick Should a Tenon Be? The One-Third Rule
- What Tools Do You Need to Cut These Joints by Hand or Machine?
- How Do You Cut, Fit, and Assemble a Mortise and Tenon Joint?
- When Should You Choose Mortise and Tenon Over Other Joints?
- Why Do Mortise and Tenon Joints Fail, and How Do You Fix Them?
- What Do Furniture Makers Actually Look for in a Joint Like This?
- Why Mortise and Tenon Still Matters in Modern Woodworking
- Where to Learn More About Joinery and Sizing
- Sources
- FAQ
What Types of Mortise and Tenon Joints Should You Know?
Not every mortise and tenon joint looks or behaves the same way, and picking the right variant matters as much as cutting it well.
Through tenons pass completely through the mortised piece and show on the far face, often with a wedge driven into a saw kerf to lock them permanently. Blind tenons stop short of the far face, staying hidden inside the joint. Most cabinet and furniture work uses blind tenons because they keep a clean look on show surfaces.
Haunched tenons add a short stub near the top edge that fills a groove (common where a panel groove would otherwise weaken the joint), and a mitered haunch lets two haunched rails meet at a corner without one weakening the other. Wedged and tusk tenons extend through the mortise and get locked with a wedge or removable pin, which makes them ideal for knockdown furniture you plan to disassemble for moving, since the pin comes out and the piece breaks down cleanly.
Loose, or floating, tenons skip the integral tongue entirely. Instead, you cut two mortises and glue in a separate tenon stub, a method that has largely replaced hand-cut tenons in shops running a Festool Domino or similar loose tenon jig. Biscuits and dowels can substitute for light-duty joints, but neither matches the shear resistance of a true tenon.
When wide rails or aprons would leave a mortise dangerously large, twin tenons split the load across two smaller tenons side by side, preserving strength without hollowing out too much of the stock.
- Through tenon: visible, often wedged, strong and traditional
- Blind tenon: hidden, standard for most furniture
- Haunched tenon: fills a groove without sacrificing strength
- Wedged/tusk tenon: built for knockdown assembly
- Loose tenon: fast, jig-friendly, no integral tongue needed
How Thick Should a Tenon Be? The One-Third Rule
Size the tenon at roughly one-third the thickness of the stock it’s cut from. On ¾ inch stock, that puts you at a ¼ inch tenon, which leaves enough mortise wall on either side to resist splitting while keeping the tenon itself thick enough to shrug off shear force.
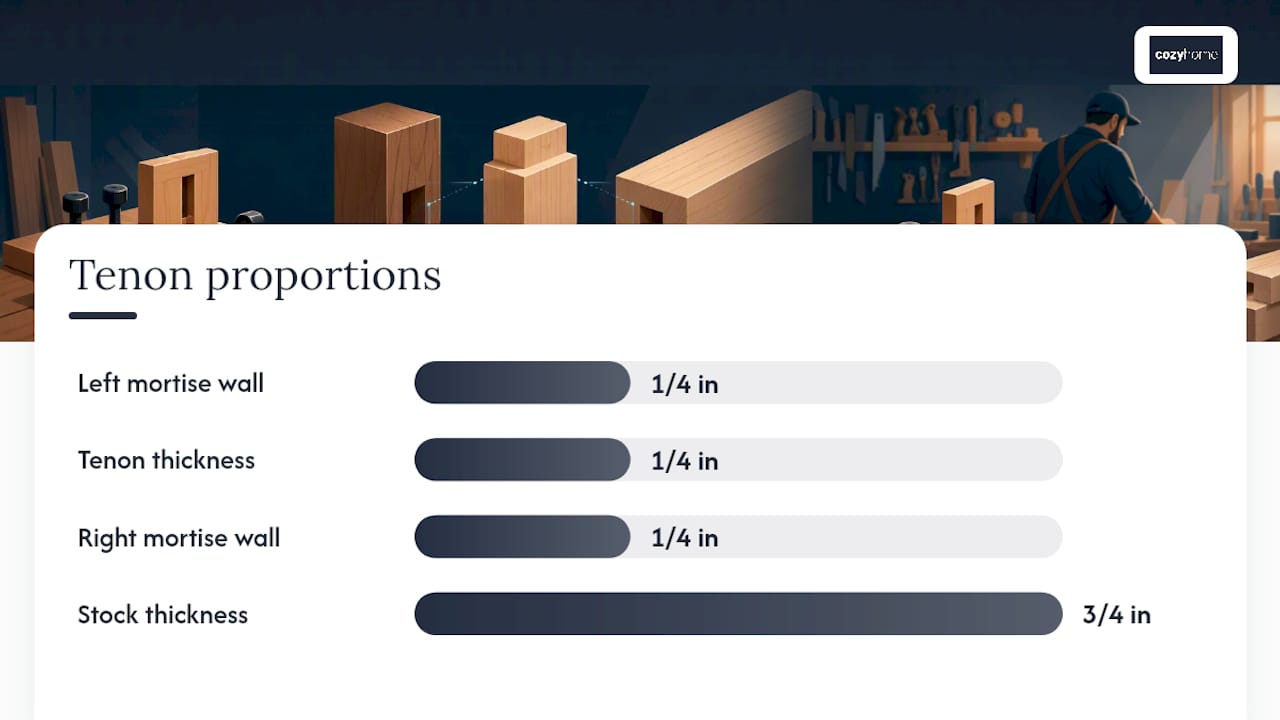
That ratio isn’t absolute. In table aprons and thick legs, where the surrounding wood has plenty of mass to spare, the tenon can grow toward 40 to 50 percent of the stock thickness without weakening the mortised leg. Softer woods like pine sometimes call for a slightly thicker tenon to compensate for lower shear strength, while dense hardwoods can run closer to the standard third.
Quick reference for marking: Tenon length typically runs two to three times its thickness, and the mortise depth should leave at least ⅛ inch of solid wood at the bottom so you’re not cutting through the far face by accident. Mortise walls need a minimum of ⅛ inch of remaining material on each side after the mortise is cut. Set your marking gauge to these numbers once, lock the fence, and use the same setting on both the mortise and the tenon so the two halves are marked from identical reference points. That single habit prevents more fitting headaches than any tool upgrade.
What Tools Do You Need to Cut These Joints by Hand or Machine?
Your tool choice depends less on the joint and more on how many you’re cutting and how much precision your current setup allows.
Hand tool route: A mortise chisel (thicker and stiffer than a bench chisel), a mallet, a marking gauge, a backsaw, and a shoulder plane will get you through any mortise and tenon joint without power equipment. This method is slower, but it teaches you to read grain and feel resistance, skills that transfer to every other joint you’ll cut.
Machine route: A hollow-chisel mortiser is the fastest way to cut clean, square mortises repeatedly, and it’s worth the investment if you’re building more than a few chairs a year. A drill press with a Forstner bit works as a budget substitute, hogging out the bulk of the mortise before you square the corners with a chisel. For tenons, a table saw tenoning jig rides the workpiece vertically past the blade for dead-flat cheeks, while a router mortise jig handles both halves of the joint with template guides and is popular for loose tenon work.
- Mortise chisel and mallet for hand-cut mortises
- Drill press with Forstner bit for fast hogging
- Hollow-chisel mortiser for repeat production work
- Table saw tenoning jig for flat, repeatable cheeks
- Router mortise jig for loose tenon systems
Pro Tip: Whatever jig you use, clamp a test piece from the same stock and cut a sample mortise and tenon before touching your actual project parts. A five-minute test cut saves an afternoon of ruined table legs.
How Do You Cut, Fit, and Assemble a Mortise and Tenon Joint?
Sequence matters more than most beginners realize. Cut the mortise first, then fit the tenon to it, because it’s far easier to shave a tenon thinner than to widen a mortise that came out slightly undersized.
- Lay out both pieces using a mortise gauge and a marking knife, referencing the same face and edge on every part so your lines stay consistent across the whole project.
- Hog out the mortise with a drill press and Forstner bit, then clean the walls square with a sharp chisel; this beginner-friendly workflow balances speed with the control a chisel gives you at the corners.
- Cut the tenon on a table saw with a tenoning jig or by hand with a backsaw, sizing it a hair oversized so you can pare down to a snug fit.
- Cut the shoulders carefully since they set the joint’s final reveal, then dry-fit the whole assembly without glue. A well-fit joint slides together with hand pressure and shows zero lateral play; if it’s too tight, pare thin shavings from the tenon cheeks rather than the shoulders.
- Glue the cheeks, not the shoulders. Long grain to long grain contact is where the strength lives, and glue squeeze-out at the shoulders just makes cleanup harder without adding holding power.
- Clamp, check for square, and let it cure according to your glue’s rated time before handling the joint under load.
For locking without relying purely on glue, drawboring offsets the peg hole in the tenon slightly toward the shoulder. Driving a tapered peg through pulls the tenon tight against the mortise shoulder and creates clamp action on its own, which is forgiving if your fit is a touch loose. Wedges through a through tenon do similar work for knockdown pieces.
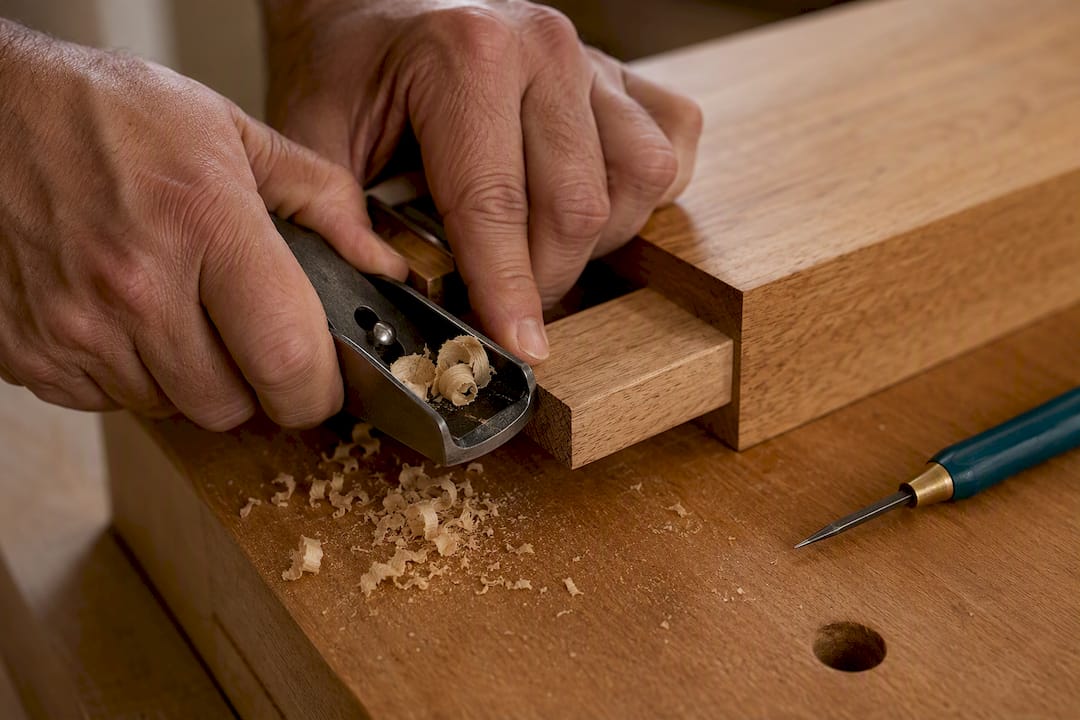
Pro Tip: Leave through tenons slightly proud of the surface until glue cures fully, then flush-trim with a block plane. Trimming before the glue sets risks smearing squeeze-out across your show face.
When Should You Choose Mortise and Tenon Over Other Joints?
This joint earns its reputation in structural furniture and timber framing, where a chair leg or door frame takes repeated stress from years of use. Anywhere racking forces (the twisting motion that loosens weaker joints over time) are a concern, mortise and tenon outperforms simpler options.
- Chair and table leg-to-apron connections, where twisting loads are constant
- Door and window frame stiles and rails
- Timber frame post-and-beam construction, often using housed joints with pegs for demountability
- Exposed tenon styles on trestle tables and Craftsman-style furniture, chosen for looks as much as strength
Knockdown furniture favors wedged or pegged tenons you can disassemble, while permanent case furniture typically glues the joint solid. For lighter-duty work like cabinet casework, drawer boxes, or shelving that won’t see racking stress, dovetails handle pull-out resistance better while pocket screws or biscuits get the job done faster and cheaper. Save the mortise and tenon for joints that actually need to fight twisting and shear.
Why Do Mortise and Tenon Joints Fail, and How Do You Fix Them?
Most failures trace back to fit, not the joint design itself. A loose joint usually means the tenon shrank after drying or was cut undersized to begin with; a split mortise wall often means the mortise was cut too close to the edge of the stock or the tenon was forced in too tight. Misaligned shoulders point to inconsistent reference faces during layout, usually from switching which edge you measured from partway through the project.
- Loose joint: add a glued shim to the tenon cheek, or drill and drive a peg through for mechanical lock
- Split mortise wall: re-mortise slightly oversized and fit a new, slightly larger tenon, or sister in a repair block
- Misaligned shoulders: trim the offending shoulder with a shoulder plane, checking square against the same reference face every pass
- Recurring looseness in old furniture: a drawbored peg often solves what glue alone can’t
Prevention beats repair every time. Dry-fit before any glue touches the joint, glue only the cheeks, and clamp evenly rather than cranking one clamp tight and hoping the joint squares itself. Rushing the glue-up is the single most common way a well-cut joint turns into a wobbly one.
What Do Furniture Makers Actually Look for in a Joint Like This?
Joinery is where furniture quality either holds up or falls apart, and it’s a big part of what separates pieces built to last from pieces built to sell once. We look at how tenons are fit, whether cheeks show tight, gap-free contact, and whether the stock was properly dried before assembly. Our craftsmanship standards lean on kiln-dried hardwood stock, because wood that hasn’t stabilized moves after assembly and stresses every joint in the piece. It is recommended to keep finished furniture in a home environment between 35 and 55 percent relative humidity to protect joinery for the long haul.
If you’re evaluating a piece before you buy, our guide to spotting quality construction walks through the visual cues that separate solid joinery from shortcuts. Our showroom team is always glad to talk through joinery questions in person if you’re weighing a custom piece.
Why Mortise and Tenon Still Matters in Modern Woodworking
The mechanical case for this joint hasn’t changed in centuries: long grain glue surfaces plus mechanical resistance to twisting still beat almost every modern alternative for chairs and frames. What has changed is access. Hollow-chisel mortisers and loose tenon jigs have stripped away the hand-tool learning curve that once kept this joint out of reach for hobbyists. Learning the traditional cuts still pays off on show pieces and heirloom furniture, but for a quick shelf bracket, a faster joint is the smarter use of your evening.
— Dean P.
Where to Learn More About Joinery and Sizing
For deeper technical detail, TimberFrameHQ’s guide to housed mortise and tenon joints covers timber-frame engineering, while Wikipedia’s overview is a solid starting point for historical variants and terminology.
Sources
- Mortise and tenon joint — KREG Learn
- Rob Cosman — Mortise and Tenon Joints (newsletter)
- How to make simple mortise and tenon joints — Family Handyman
- Sawyer Design — Drawboring technique
FAQ
What Are the Downsides of a Mortise and Tenon Joint?
The main drawback is precision. A joint cut even slightly off ruins the fit, and poor fit undermines the strength the joint is known for. It also takes longer to cut than pocket screws, dowels, or biscuits, which matters if you’re building in volume.
Are Mortise and Tenon Joints the Strongest Joint?
They’re widely considered the strongest choice for resisting racking and twisting forces in chairs, doors, and table aprons, since a properly fitted, glued joint is stronger than the surrounding wood. For different stress types, like drawer sides resisting pull-out, dovetails perform better instead.
What Is the Hardest Joint in Carpentry?
Opinions vary among woodworkers, but dovetails and hand-cut mortise and tenon joints both rank among the most demanding, since both require exact layout and tight tolerances with zero room for error. Mortise and tenon adds the challenge of matching two separate pieces (the hole and the tongue) rather than interlocking pins cut from the same reference lines.
What Is the Easiest Way to Make a Mortise and Tenon Joint?
For beginners, the simplest workflow is hogging out the mortise with a drill press or Forstner bit, then squaring the walls with a chisel. Cut the tenon afterward on a table saw with a tenoning jig, sized to fit the mortise you already have rather than the other way around.